Styles
Wildstyle Graffiti Alphabet Drills: Make Complex Letters Read Before You Add More
Use these wildstyle graffiti alphabet drills to fix bad handoffs, cleaner interlocks, and open negative space before your letters turn into noise.
Published Mar 24, 2026 · Updated Mar 24, 2026 · 14 min read · By SprayShift Editorial
Quick Answer
If your wildstyle alphabet keeps turning muddy, stop adding moves and drill the handoffs instead. Start with pairs like VE, CT, and OR, keep one shared lean through the whole row, and protect the little air pockets between letters. If you cover the arrows and the word still reads, you are on the right track.
Who This Is For
Writers who already understand basic graffiti structure and want to push into readable wildstyle without turning every page into tangled repair work. If your plain letters still collapse, tighten the basics first and come back.
Table of Contents
- If the shared spine goes, the row goes with it
- Drill letter pairs before you waste time on the full alphabet
- Use a three-lane page so the sketch has nowhere to hide
- Fix VE, CT, and OR first because those pairs ruin a lot of wildstyle rows
- Worked example: one decent drill spread tells you more than three flashy pages
- Pick benchmark words that expose problems fast
- Your middle letters should work harder than your arrows
- Failure example: every letter wants to be the headline, so the center dies first
- A 25-minute loop that keeps wildstyle from getting louder and dumber
- Know when the row is ready to leave the page and stop eating itself
Drill letter pairs before you waste time on the full alphabet
Readers do not struggle with the alphabet in the abstract. They struggle with the point where one letter hands off to the next one. That is where wildstyle either gets mean in a good way or just turns clogged.
So do not start with 26 letters. Start with four or five nasty handoffs and run them until they stop fighting. That will teach you more than one dramatic A-Z page full of random decisions.
| Pair or family | What usually breaks | What to watch first | Good test word |
|---|---|---|---|
| VE and VA | The opener overpowers the second letter and pinches the join | Keep the second letter wider and calmer than the first hit | VECTOR |
| CT and ET | The crossbar crashes into the next letter and muddies the middle | Leave a real notch of air before the T starts throwing weight | COVERT |
| OR and AR | The round letter swells and the exit gets bolted on too late | Open the round pocket first, then decide where the exit launches | SAVOR |
| RX and RZ | The leg and exit both try to be the hero move | Pick one aggressive finish, not two | RAZER |
Use a three-lane page so the sketch has nowhere to hide
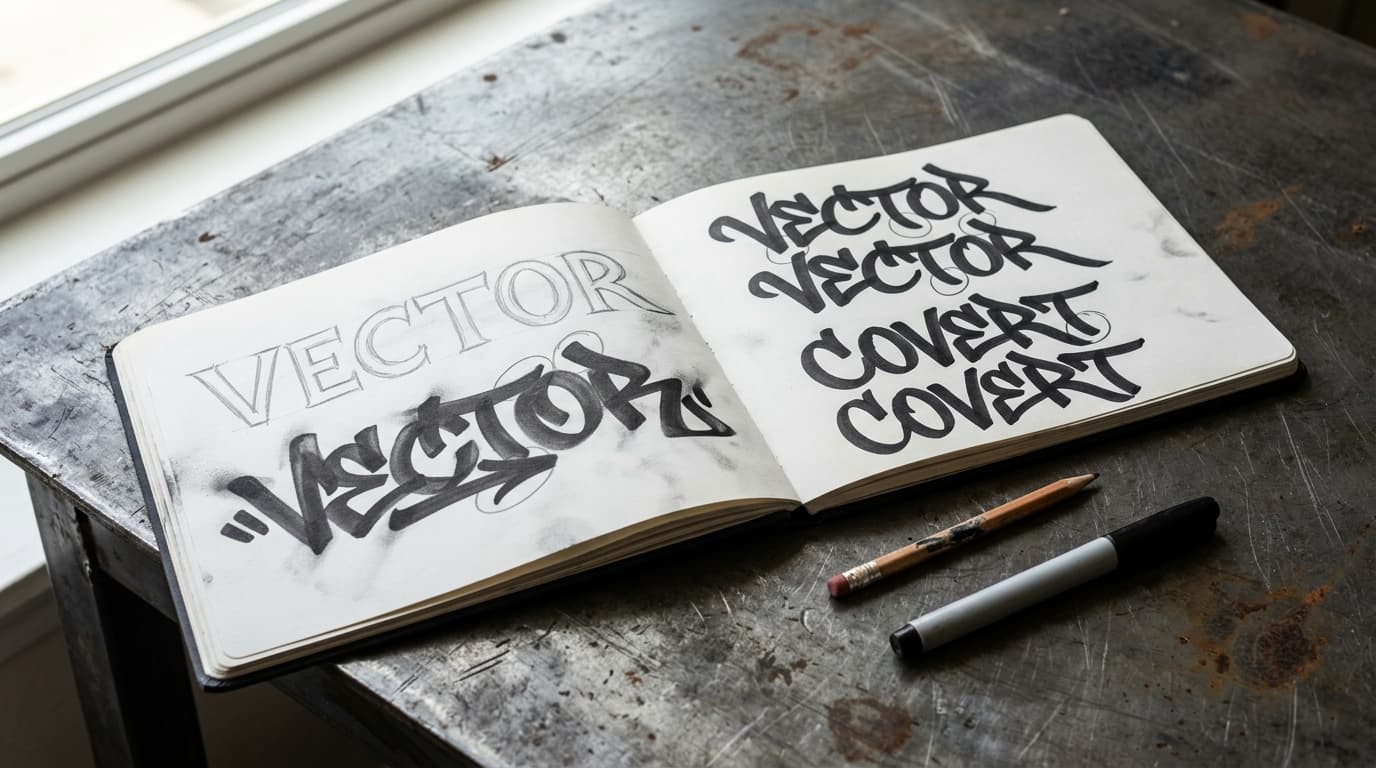
A useful wildstyle page looks almost boring at first. Good. That means it is probably teaching you something. Give yourself one lane for skeleton, one lane for compression, and one lane for the final readable push.
Lane one proves the word stands up at all. Lane two shows whether the bars can tighten without choking each other. Lane three earns the stylish moves. If lane three looks sick but lane two was already broken, the page is lying to you.
One small rule that saves a lot of sketches: let the middle letters be quieter than the opener and the finish. If every letter is screaming, none of them are leading.
- Lane 1: draw the word in plain skeleton form with one baseline, one cap height, and one lean.
- Lane 2: compress the same word into a tighter shell and reuse the same center movement across every letter.
- Lane 3: add only the moves that improve rhythm: one opener accent, one exit accent, and just enough interlock to connect the row.
- Circle the pinch points, then redraw only the failing pairs instead of restarting the whole alphabet from zero.
Fix VE, CT, and OR first because those pairs ruin a lot of wildstyle rows
These are the kind of drills I would actually keep in a blackbook. Not because they look cool, but because they expose the exact points where a row starts choking itself.
VE usually dies when the V comes in too hard and the E gets forced to shrink or twist. CT usually dies when the C closes too much and the T tries to stab into the same pocket. OR usually dies when the O gets swollen, then the R leg gets attached like an afterthought.
If those three pairs start behaving, a lot of your bigger words suddenly feel less mysterious.
- VE: let the V hit first, then give the E a flatter shoulder so it can catch the momentum instead of colliding with it.
- CT: if the C pocket closes, the T has nowhere to go except into the reader's face.
- OR: build the O and its inner pocket first, then launch the R leg from a spot that already feels stable.
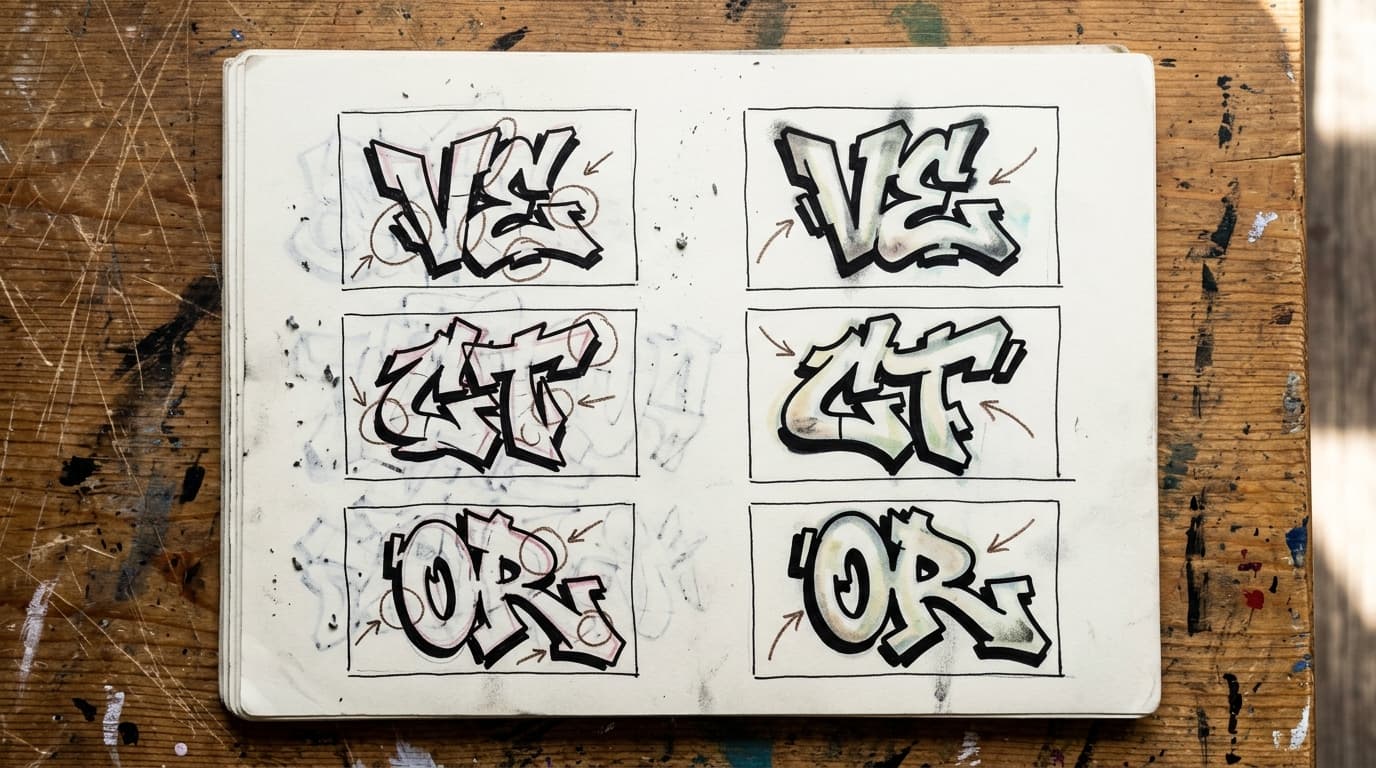
This is the kind of page that actually helps: bad pair on the left, fixed pair on the right, with the ugly little pinch points called out instead of hidden.
Worked example: one decent drill spread tells you more than three flashy pages
This spread works because it is not pretending one page fixed the whole style. It takes one word, tightens it, then checks whether the same logic still holds up in a second benchmark word.
That is the useful part. Same lean. Same basic attitude. Same few problems. You can actually tell whether the V-to-E handoff got better instead of just admiring a darker redraw.
Useful wildstyle practice looks like this: plain structure first, one shared movement second, then short word tests to see exactly where the air pockets collapse.
Pick benchmark words that expose problems fast
A benchmark word should snitch on your weak spots almost immediately. If it takes half a page before the row starts acting weird, the word is too forgiving.
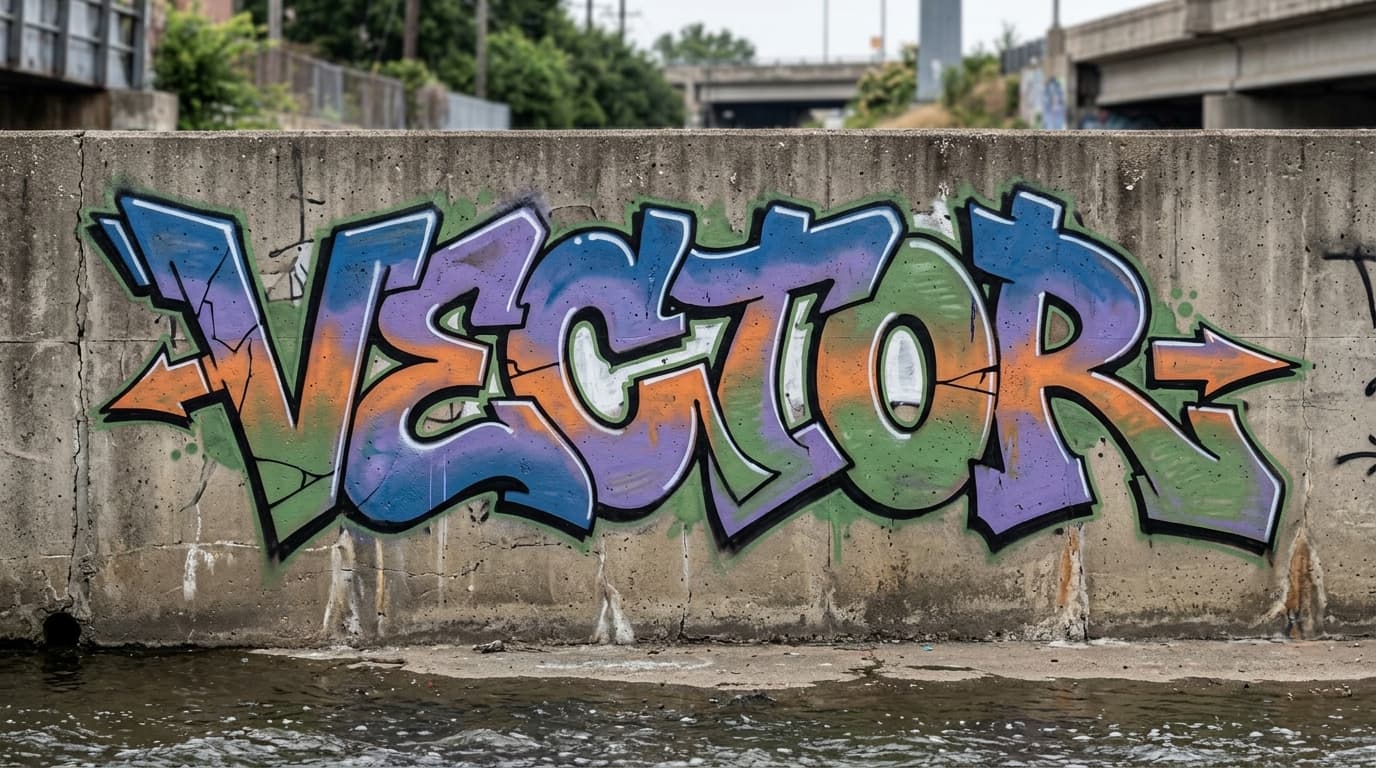
VECTOR is good because it forces a hard opener into a tighter center, then asks the O and R to keep the row from choking. COVERT is even meaner because the C-O pocket and the V-E transfer both get exposed fast. If a word like that collapses, the alphabet is not ready yet.
- VECTOR: good for checking whether your opener bullies the rest of the word.
- COVERT: good for checking whether round pockets survive inside a compressed row.
- SAVER: good when your S feels slick alone but turns weak next to angled letters.
- NEXUS: good when the center keeps knotting up and you cannot tell which pair is at fault.
Next Step
Run a Readable Wildstyle Drill Word
Keep the constraints tight: one shared spine, one pressure-release round letter, and no more than two arrows across the whole word.
Your middle letters should work harder than your arrows
A lot of wildstyle gets praised for energy when the middle of the word is doing almost nothing. The arrows look expensive. The center looks dead. That is a bad trade.
In a strong row, the opener gives you the first hit, but the middle letters keep the sentence alive. If the E, C, and T in VECTOR are just there to survive until the R exit shows up, the piece is weak no matter how nice the outer moves look.
This is where I would actually judge the sketch: the pocket between two letters that almost touch. If that tiny gap still has shape, the row probably has a future. If it disappears, the whole thing starts turning to soup.
- Keep one hero move near the first third of the word, not on every letter.
- Let one round or semi-round letter reopen breathing room before the exit.
- Treat tiny interior gaps like treasure. Once they disappear, the row gets muddy fast.
Failure example: every letter wants to be the headline, so the center dies first
This VECTOR fails for a simple reason: every letter wants applause. The opener is loud, the middle letters are louder, and the exit keeps stacking more decisions on top of a row that was already cramped.
Look at where it really breaks. The VE handoff is too tight, the middle starts closing up, and the O and R stop giving the eye any room to breathe. The paint still looks believable. The piece still has attitude. But it is teaching the wrong lesson.
When a sketch gets here, do not redraw the whole thing from scratch. Rip out the smallest arrows, reopen the middle, then see whether the word suddenly reads better. It often does.
- Delete the smallest arrows first and see whether the word immediately reads better.
- Reopen the O, C, or S pockets before you redraw fancy end pieces.
- Make the middle letters calmer than the opener and exit on the next pass.
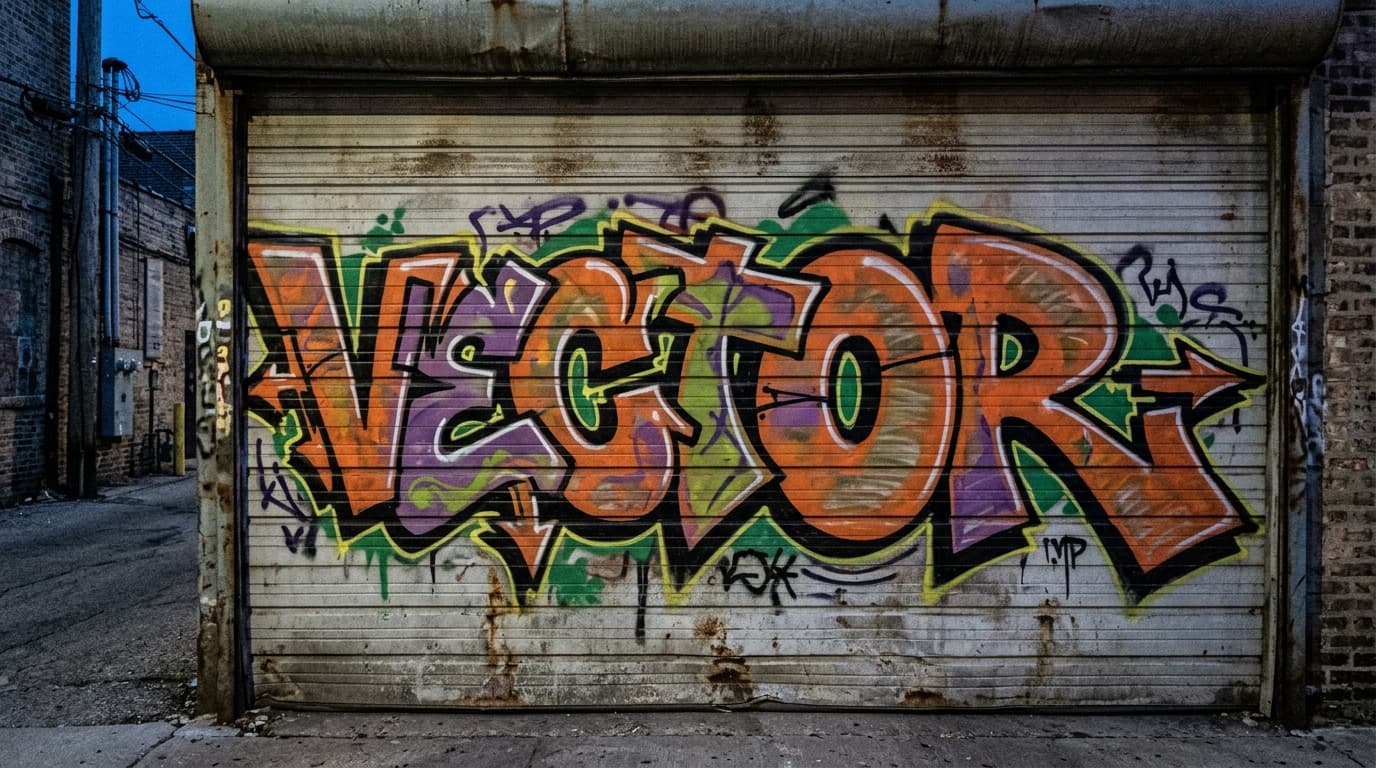
Failure example: this one looks painted too early. The VE handoff is cramped, the middle muddies up, and the R tries to save a word that was already slipping.
A 25-minute loop that keeps wildstyle from getting louder and dumber
Wildstyle gets worse fast when the session goes too long and you start rewarding every half-good idea. Short loops help because you still remember what changed the row.
Keep the same word for the whole loop. If you switch words and angle logic at the same time, you will not know what actually improved.
| Minutes | Focus | What you keep |
|---|---|---|
| 5 | Skeleton row | One plain word with a stable lean and baseline |
| 7 | Compression pass | One tighter shell with a shared spine |
| 8 | Benchmark word test | One readable wildstyle version plus one marked-up failure |
| 5 | Subtraction pass | One cleaner final row after removing the extras that did not help |
Know when the row is ready to leave the page and stop eating itself
Do not move a wildstyle row to a wall just because it feels hyped. Move it when the row survives subtraction. Cover the accents, step back, and see whether the word still moves from left to right.
The second sign is repeatability. One clean word can be luck. Two or three benchmark words using the same logic is a better sign that the style is actually settling into your hand.
- The row still reads after you cover the arrows and hooks.
- One round pocket stays open in the back half of the word.
- The same lean and handoff rules work on at least two benchmark words.
FAQ
How do you practice a wildstyle graffiti alphabet without making it unreadable?
Should beginners learn wildstyle before basic graffiti letters?
What are the hardest letters in wildstyle?
What makes wildstyle readable instead of messy?
Related Reads and Next Actions
Next Step
Ready to Apply This in a Real Generation?
Take one short word through a readable wildstyle pass today, then strip half the extras and compare the result. The cleaner version usually teaches more than the louder one.